 Add Row
  Add
Add 

Are you wondering how a simple upgrade could completely transform the warmth and energy efficiency of your home? Do you wish you could boost your comfort, save on energy bills, and give your rooms a fresh, inviting atmosphere—all by mastering radiator installation? In this comprehensive guide, you’ll learn exactly how to install a radiator, when you should replace a radiator, and how to make sure your central heating system runs seamlessly. Read on for practical tips, expert-approved steps, and everything you need for a professional-quality result—no matter your experience level.
Are You Ready to Transform Your Space with Radiator Installation?
- Unlock superior comfort and energy efficiency with expert radiator installation.
- Enhance your home’s heating system with a seamless installation process.
- Discover actionable tips to ensure your central heating runs optimally.

Radiator installation is more than just swapping out an old fixture—it's about maximizing home comfort, boosting energy efficiency , and upgrading your living space. Whether you’re replacing an outdated unit or installing a new radiator to improve your central heating system , the process requires careful planning and the right approach. Many homeowners don’t realize that a professional, precise radiator installation can save on heating costs, create balanced room temperatures, and even enhance property value.
Before you dive into the step-by-step process to install a radiator , it’s essential to understand the types of radiators, when replacing a radiator is necessary, and what tools will make the job easier. You’ll also want to familiarize yourself with essential safety measures, choose the best panel radiators for your rooms, and know how to deal with stubborn issues such as trapped air or leaky radiator valves . By following our actionable advice, you can bring professional results to your DIY project or confidently seek expert help for bigger installations.
Mastering Radiator Installation: A Comprehensive Step by Step Guide
- The fundamentals of radiator installation and when to replace a radiator.
- Key considerations before you install a radiator in your home.
- Safety measures and professional standards to follow for central heating set-up.
| Method | DIY Difficulty | Time Required | Recommended For |
|---|---|---|---|
| Professional Service | Low | 2-4 hours | Comprehensive swaps |
| DIY | Moderate-High | 3-6 hours | Experienced homeowners |
“Quality radiator installation not only increases comfort but maximizes system efficiency—saving you money in the long run.”
To install a radiator effectively, start by assessing your current heating system and evaluating the type of radiator best suited to your needs. Panel radiators are popular for their efficiency and sleek design, while older homes may require a custom fit for existing pipework. Always consider professional installation for comprehensive overhauls, especially when it comes to integrating with your central heating system or handling gas boiler connections.
Laying out your tools and understanding the step-by-step process ensure both safety and quality. To avoid common pitfalls, always turn off and cool your heating system before you replace a radiator, and use PTFE tape on the radiator valve connections for a watertight seal. Safety glasses, gloves, and a tidy, protected workspace help you avoid accidental damage to both your property and the new equipment. By the end of this guide, you’ll have the knowledge to tackle radiator installation with the confidence of a pro.
If you're looking for more detailed, locally focused advice on maximizing your radiator's efficiency and ensuring a smooth installation, you might find the Chesterfield radiator installation guide especially helpful. It covers practical tips and troubleshooting steps that complement the process outlined here.
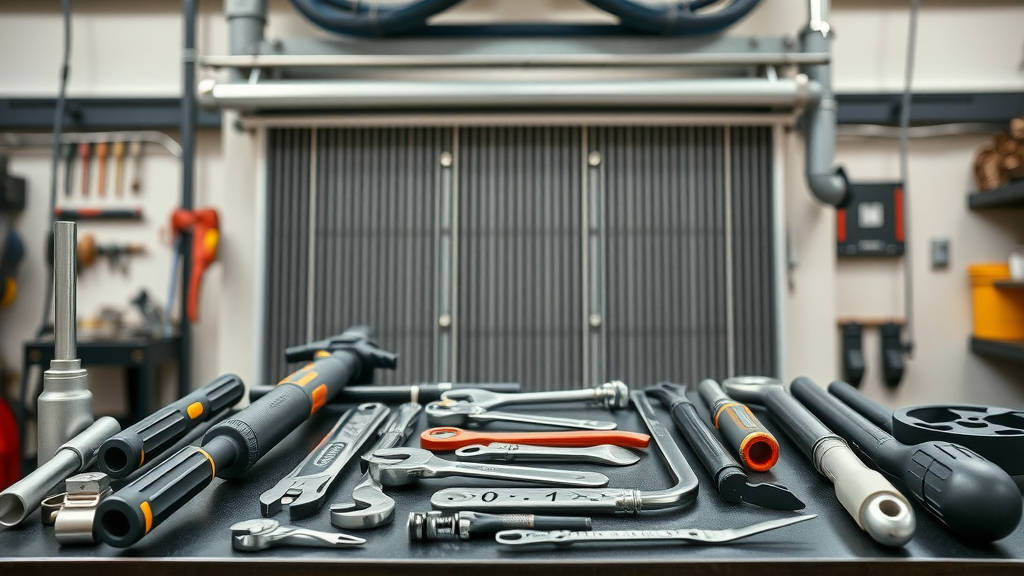
Essential Tools and Materials for Radiator Installation
- Adjustable spanner
- Pipe cutter
- Spirit level
- Radiator brackets and radiator valve
- PTFE tape
- Bleed valve tool
- Wall plugs and screws
- Bucket and dust sheets
Having the right tools and materials on hand is crucial for a safe and effective radiator installation. Key essentials like an adjustable spanner allow you to easily tighten or loosen radiator valves and pipe fittings. A pipe cutter ensures clean cuts if you need to tweak existing pipework, while a spirit level helps achieve that perfectly horizontal finish when you fit panel radiators onto your wall.
The use of radiator brackets , wall plugs and screws guarantees that your new unit is securely mounted—reducing the risk of future leaks or misalignment. Don’t forget a bleed valve tool for releasing trapped air after installation, as well as PTFE tape to wrap around screw threads for leak protection. Always have dust sheets and a bucket handy to keep your workspace tidy and capture any residual water. Familiarity with these materials not only simplifies the process but also elevates your results to professional standards.
Step by Step Radiator Installation: How to Install a Radiator Correctly
Preparing Your Heating System and Workspace
- Switch off central heating and allow to cool
- Isolate water supply
- Lay dust sheets and prepare tools

Preparation is vital before you install a radiator . Always start by switching off your central heating system and letting it cool down to prevent burns or water spills from hot water. Locate and close the appropriate isolating valves to stop the water flow to the affected radiator, minimizing the risk of leaks or flooding.
Cover the workspace with dust sheets and gather essential tools such as an adjustable spanner , pipe cutter , and all materials. Spend a few minutes familiarizing yourself with the bleed valve tool and PTFE tape before starting. Clean and clear the area—having everything within reach speeds up your project and ensures you won’t be scrambling for tools mid-way through your radiator installation.
How to Remove the Radiator Safely
- Loosen radiator valve
- Drain the radiator into a bucket
- Carefully detach from the wall
- Clean the space and prepare for new radiator
When you’re set to remove the radiator , start by loosening the valve outlet with your adjustable spanner . Position a large bucket beneath the radiator valve, and gently open it to release any remaining water; this prevents damage to floors and surrounding surfaces.
Once drained, unscrew the radiator brackets and lift the unit away from the wall—take care to support its weight evenly. Give the exposed area a good clean; using wire wool is effective for removing stubborn old sealant or corrosion from pipe ends. This clean base ensures your replacement radiator will sit flush and operate efficiently in its new position.
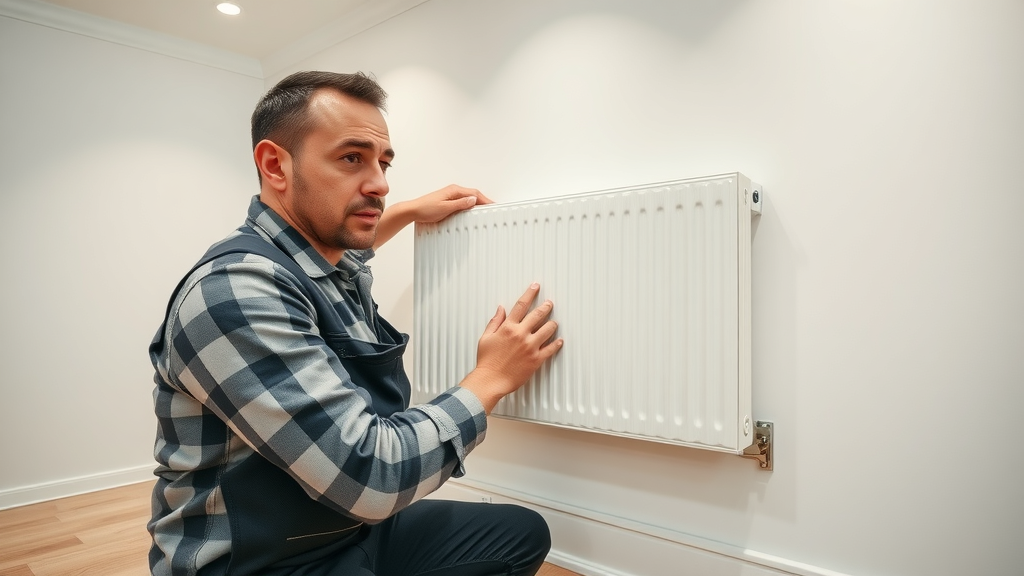
Fitting the Bottom Bracket and Marking Out Panel Radiators
- Use a spirit level for accurate alignment
- Drill and secure bottom bracket
- Attach panel radiators with safety in mind
With the old unit removed, it’s time to focus on bottom bracket installation. Mark the new radiator’s position on the wall, making sure to measure the distance between current pipework and bracket slots. Using a spirit level guarantees the brackets will hold your radiator perfectly straight—avoiding uneven mounting that could compromise both function and appearance.
Drill and plug the wall, using suitable anchors for your wall type (brick, plaster, etc.), and firmly secure the bottom brackets with screws. Attach your panel radiator , confirming its alignment before tightening all fastenings. Take extra care during this step, as stability here will safeguard against future issues such as leaks or tilts.
Visual Step Guide: Radiator Installation Fundamentals
Installing the New Radiator and Radiator Valve
- Fit new radiator valve with PTFE tape
- Hang new radiator onto brackets
- Reconnect pipework and ensure tight fittings
To install a radiator with complete confidence, wrap PTFE tape around the threads of the new radiator valve —this creates a tight seal to prevent water leaks. Fit the valve to the radiator body first, then position your new radiator onto the previously installed brackets. Once hung, connect the existing pipework to the appropriate inlets, ensuring all connections are snug and leak-free.
Use your adjustable spanner to finish tightening the fittings. Double-check that the alignment remains even, especially before fully securing all bolts and screws. If you encounter resistance while fitting valves or pipes, stop and assess; forcing a connection can cause future leaks and compromise your central heating’s efficiency.
Bleeding the Radiator and Checking for Leaks
- Open bleed valve to release air
- Fill system and check all connections
- Inspect for leaks and tighten as necessary
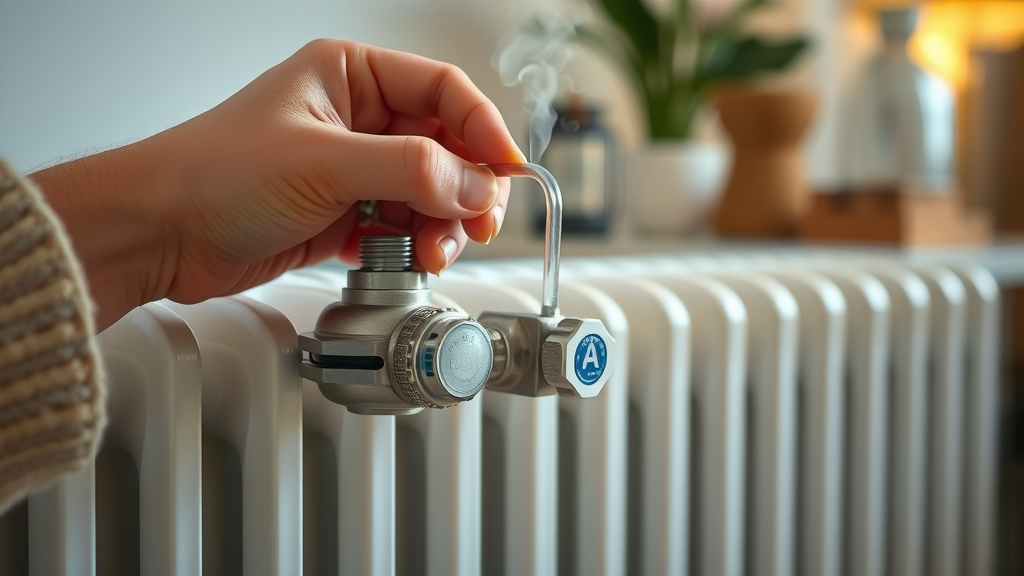
One of the most crucial steps in radiator installation is using the bleed valve to release any trapped air in your new radiator. Insert the bleed valve tool and open the valve slowly—air will hiss out, followed by a slight trickle of water. This ensures hot water circulates throughout the entire radiator, preventing cold spots and maximizing your heating system’s efficiency .
Refill your central heating system and check all valves, joints, and brackets for leaks—pay special attention to any drips or unusual noises. Tighten as needed and have a dry cloth ready for any small spills. Properly bleeding the radiator and confirming all seals are secure guarantees both energy efficiency and lasting home comfort.
Testing Your Central Heat and Final Checks
- Switch on central heating
- Ensure even heat distribution
- Make any additional adjustments
Once all connections are in place and air has been released, it’s time to turn on your central heating system. Monitor the newly installed radiator as the system heats up. Even warmth across the radiator’s surface confirms a successful radiator installation .
If you notice areas that remain cold, double-check that the radiator bleed valve is closed and that no air remains trapped. This is also a good moment to observe for any minor leaks or loose fittings. Address adjustments now, so your system operates at peak performance and you enjoy steady, reliable home comfort.
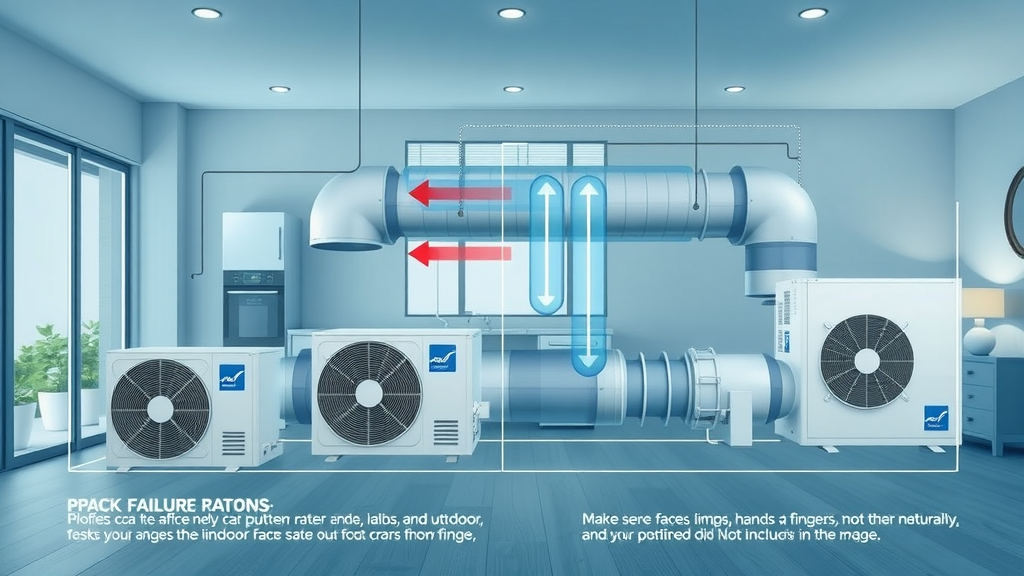
Replace a Radiator: When, Why, and How
- Identify signs of radiator failure (cold spots, leaks, corrosion)
- Select appropriate panel radiators for your needs
- Follow step guide for professional replacement
Sometimes, repairs aren’t enough, and you’ll need to replace a radiator entirely. Watch for warning signs like cold spots even after bleeding, persistent leaks, visible rust or corrosion, and very uneven heat. Choosing the right replacement radiator means considering the size of your room, your central heating system specifications, and personal aesthetic preferences—modern panel radiators offer impressive energy efficiency and design flexibility.
Follow the step by step guide outlined above, paying extra attention to measurements and sealing connections with PTFE tape . When in doubt or if your heating system is especially complex, consulting a professional can save both time and future repair costs. Correctly replacing a radiator will restore comfort and optimize your entire home’s heat management.
Maintaining Peak Performance: Tips After Radiator Installation
- Regularly check radiator valve and bleed valve
- Annual checks of central heating system
- Professional servicing recommendations
Keep your investment performing efficiently by checking radiator valves and bleed valves at least twice a year. Schedule an annual inspection of your central heating system —a simple maintenance visit can prevent small issues from turning into big ones.
If you notice any changes—such as strange noises, slow heating, or persistent leaks—address them quickly, as they may signal the need to replace a radiator or perform additional system work. Regular maintenance extends the life of your panel radiators and ensures your home remains comfortable and cost-effective year after year.
People Also Ask: Radiator Installation Cost, Feasibility, and More
How much does it cost to get a radiator installed?
- The average cost for radiator installation is between $300 and $800, depending on complexity, location, and radiator model.
- Professional installation often includes system testing and warranty.
How much does a radiator install cost?
- DIY install typically ranges from $150 (for parts) to $300+, while professional services include labor and safety checks, impacting total price.
Can I install a radiator myself?
- It is possible for experienced DIY enthusiasts, but professional radiator installation is recommended to ensure quality, safety, and warranty compliance.
Is installing a radiator a big job?
- Installation can be labor intensive, involving draining, plumbing, and system testing; complexity depends on your current heating system and radiator compatibility.

Frequently Asked Questions about Radiator Installation
-
How long does radiator installation take?
Professional installation typically takes 2-4 hours, while a thorough DIY job may require three to six hours, depending on your experience and the state of your heating system. -
What types of panel radiators are best for my heating system?
Single-panel radiators are ideal for smaller spaces, while double-panel options deliver higher heat output and are better for larger rooms or properties with older insulation. -
Do I need to bleed the radiator after installation?
Yes, bleeding the radiator is essential to remove trapped air and ensure the system delivers consistent, even heating throughout your home. -
Can replacing a radiator improve central heating efficiency?
Absolutely. Upgrading to modern panel radiators and ensuring proper installation can significantly increase heat output and minimize energy waste.
Finalize Your Comfort: Choose Professional Radiator Installation Today
- Experience seamless warmth and efficient heating performance
- Expert installation for safety, quality, and peace of mind
- Contact a trusted provider to schedule your radiator installation and upgrade your living space
For maximum efficiency and comfort, schedule your radiator installation with a certified professional and enjoy a warmer, more inviting home today!
Now that you’re equipped with the essentials of radiator installation, why not take your home’s comfort and efficiency even further? Explore the central heating maintenance guide to discover proactive strategies for preventing breakdowns and keeping your entire system running smoothly all winter long. By combining expert installation with regular maintenance, you’ll enjoy reliable warmth, lower energy bills, and peace of mind season after season. Take the next step toward a truly optimized home environment—your future self will thank you.
Sources
- Which? – https://www.which.co.uk/reviews/radiators/article/how-to-replace-a-radiator-a5lac9B32WKO
- Homebuilding – https://www.homebuilding.co.uk/advice/how-to-fit-a-radiator
- Plumbworld – https://www.plumbworld.co.uk/blog/how-to-remove-and-replace-a-radiator
- British Gas – https://www.britishgas.co.uk/home-services/help-and-advice/how-to-bleed-a-radiator.html
For a comprehensive understanding of radiator installation, consider exploring the following resources:
-
“How To Replace a Radiator” : This guide provides a detailed, step-by-step approach to replacing a radiator, covering essential tools, safety precautions, and common mistakes to avoid. ( autozone.com )
-
“Preventing Radiator Damage During Installation” : This article highlights common causes of radiator damage during installation and offers practical tips to prevent such issues, ensuring a successful and damage-free installation process. ( northernradiator.com )
If you’re serious about achieving a professional-quality radiator installation, these resources will provide you with the necessary insights and guidance.


Write A Comment