Add Row
Add Element
cropper
update

Plumbing and Heating Chesterfield

Logo-plumbing and heating chesterfield
update
Add Element
update

CALL US

07966 884368

Add Element
update

EMAIL US

info@edsplumbing.co.uk

Add Element
update

OPEN 24 HOURS  OPEN

Add Element

Add Element
  • Insights Home
  • Topics
    • Eco-Friendly Plumbing Projects
    • Trade Secrets: Eco Edition
    • Smart Spend: Eco Product Picks
    • Smarter Heating to Slash Your Bills
    • Plumbing and Heating Success Stories
    • Sustainable Plumbing and Heating News
    • Innovative Heating Solutions
    • Sustainability Tips for Every Property
    • Plumbing and Heating Services
    • Emergency Plumbing
    • Boiler Installation
    • Repairs
    • and Servicing
    • Commercial Plumbing Solutions
    • Smart Underfloor Heating
  • Contact Us
  • Subscribe
Add Element
  • update
  • update
  • update
  • update
  • update
  • update
  • update
  • All Posts
  • Eco-Friendly Plumbing Projects
  • Trade Secrets: Eco Edition
  • Smart Spend: Eco Product Picks
  • Smarter Heating to Slash Your Bills
  • Plumbing and Heating Success Stories
  • Sustainable Plumbing and Heating News
  • Innovative Heating Solutions
  • Sustainability Tips for Every Property
  • Plumbing and Heating Services
  • Emergency Plumbing
  • Boiler Installation, Repairs, and Servicing
  • Commercial Plumbing Solutions
  • Smart Underfloor Heating
August 15.2025
1 Minute Read

HVAC System Maintenance: Boost Efficiency Now

Did you know nearly 75% of all HVAC system failures are preventable with a simple routine? Neglecting hvac system maintenance can turn comfort into chaos and trigger avoidable repair costs. This guide will show you how regular maintenance not only saves energy and money, but also ensures a healthier home for you and your family—giving you peace of mind for the long term .

Did You Know? 75% of HVAC System Failures Are Preventable with Regular HVAC System Maintenance

It’s staggering, but most HVAC system breakdowns can be avoided. Research from leading industry sources and official government websites shows that preventive maintenance is the single most effective way to dodge expensive and unexpected failures. A well-maintained hvac unit performs consistently, uses less energy, and extends the life of your entire system, whether it’s for heating or cooling.

Simple steps like checking air filters , cleaning the condenser coils , and scheduling biannual inspections can keep an HVAC system running smoothly through the unpredictable United States seasons. Ignoring these routine maintenance tasks, on the other hand, leads to a buildup of dust and debris that stresses the equipment, reduces indoor air quality, and can cause your energy bills to spike.

hvac system maintenance infographic - modern HVAC system components, failure prevention illustration, indoor and outdoor units, airflow arrows, modern home background

Why Prioritizing HVAC System Maintenance Can Slash Energy Bills

Prioritizing HVAC system maintenance can reduce your home’s energy consumption significantly. When the system works efficiently, every component—from the outdoor unit to the evaporator coil —cooperates seamlessly to keep your home at the desired temperature. Clogged filters and dirty coils force the hvac system to work harder, using more energy while still delivering less comfort.

  • Reliable indoor air quality starts with effective hvac system maintenance.
  • Preventive maintenance extends the life of your entire hvac system.
  • Professional ac maintenance reduces future repair costs .

Key Takeaways from This HVAC System Maintenance Guide

This guide covers everything you need to know:

  • Top benefits of consistent hvac system maintenance.
  • Critical steps for effective ac maintenance and hvac system care.
  • Integration of hvac maintenance within facilities management routines.

Understanding HVAC System Maintenance: The Foundation of Efficient AC Maintenance

To get the most from your HVAC system, understanding how routine maintenance helps is vital. Not only does maintenance prevent costly repairs, but it also keeps your air conditioning or heating systems performing at their peak, no matter what the weather brings. Proactive care ensures proper airflow and makes sure you aren’t caught off guard by unexpected breakdowns during the height of cooling or heating season. Let’s explore the nuts and bolts of an optimized hvac maintenance plan .

Definition and Importance of HVAC System Maintenance

HVAC system maintenance involves a series of checks, cleaning, and adjustments performed at regular intervals. This maintenance ensures all key system components—such as air filters, condenser coil , evaporator coil, and thermostats—operate efficiently. Regular attention protects your hvac system from breakdowns, maintains energy efficiency, and prolongs its effective lifespan. According to the EPA’s official website, a maintained system can lower your home’s energy consumption by up to 15%.

Maintenance also keeps your home’s indoor air fresh and clean, helping to reduce the risks posed by dust, pollen, and harmful particulates. It’s far less expensive to invest in regular upkeep than to pay hefty repair costs after neglect. This peace of mind is why smart homeowners and building managers include routine maintenance as a cornerstone of property care.

hvac system maintenance - technician inspecting hvac system with diagnostic tools in residential utility room

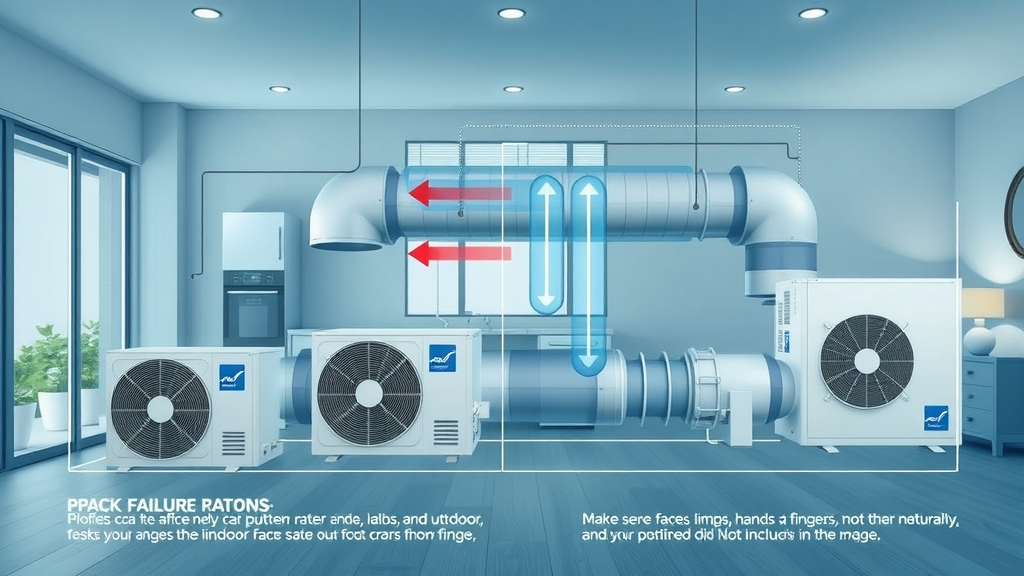
Types of HVAC Systems: Overview and Maintenance Essentials

The term hvac systems covers a variety of configurations: central air conditioners, ductless mini-splits, heat pumps, and more. Each has its own set of maintenance requirements, but they all share certain essentials for longevity and performance. Central air and split systems rely heavily on clean, unobstructed ductwork and free-flowing condensate drains. Ductless units need periodic filter cleaning and checks on their outdoor unit for debris buildup. Meanwhile, heat pumps require regular attention to both indoor and outdoor coils, especially before each major heating or cooling season .

No matter the type, each system benefits from regular professional ac maintenance —including seasonal tune-ups, refrigerant checks, and calibrating system controls. These actions not only extend system life but also protect your indoor environment. Consider setting reminders or signing up for a maintenance plan to keep your home comfortable year-round.

Comparison of HVAC Systems and Their Maintenance Requirements
System Type Main Components Key Maintenance Needs
Central Air Conditioning Outdoor condenser unit, indoor evaporator coil, ductwork Filter changes, duct cleaning, coil cleaning, thermostat testing
Ductless Mini-Split Outdoor compressor unit, indoor wall-mounted units Filter and coil cleaning, condensate drain check
Split System Indoor unit (handler/evaporator), outdoor unit (condenser) Filter change, coil inspection and cleaning, refrigerant checks
Heat Pump Reversible compressor, both indoor and outdoor coils Biannual coil cleaning, filter checks, performance assessment
"An efficient HVAC system is not a luxury—it's a necessity for comfort and health."

Comprehensive HVAC System Maintenance Checklist for Homeowners

Taking a systematic approach to hvac system maintenance keeps your home’s temperature stable, extends equipment life, and prevents surprises. This checklist makes it easy to keep up with routine maintenance —ensuring efficient operation throughout the year, especially during the intense cooling season .

  • Seasonal preventive maintenance steps
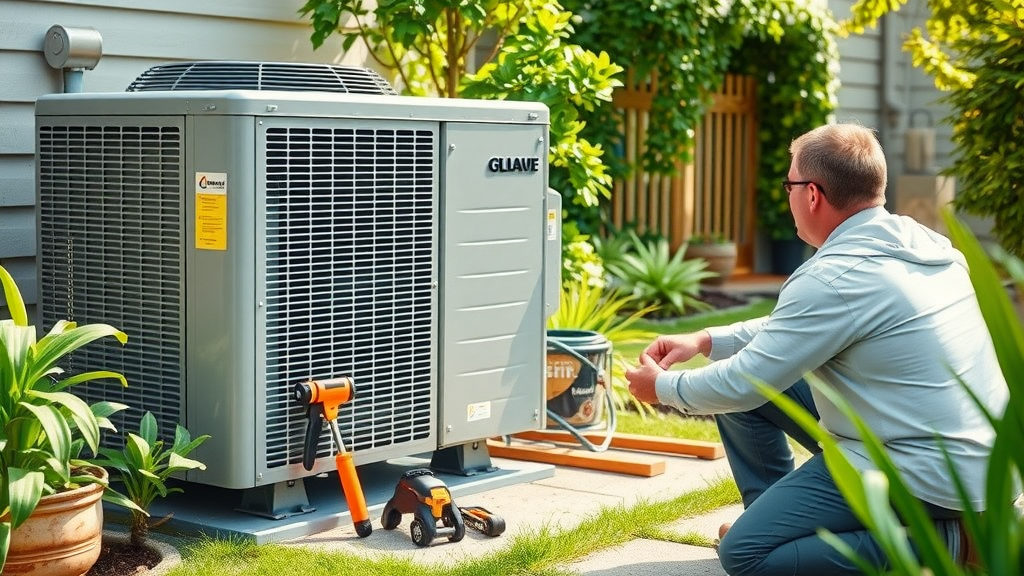
  • How to inspect and maintain the outdoor unit and condenser coil
  • Routine maintenance tips for evaporator coils and indoor air systems

For starters, always check and change your air filters every 1-3 months to prevent airflow restrictions. Next, visually inspect the outdoor unit for leaves, debris, or grass clippings that can choke airflow and impact cooling. Schedule professional cleaning for the condenser coil at least once a year—especially if your yard’s dusty or you live near construction. Indoors, make sure your evaporator coil is free of dust and check ceiling vents for proper, unobstructed airflow.

hvac system maintenance - clean outdoor condenser unit, technician kneeling, suburban patio background

The Role of AC Maintenance and Preventive Strategies in HVAC System Longevity

Preventive ac maintenance is the key to a long-lasting HVAC system. Rather than reacting to problems after they arise, scheduled care identifies early warning signs and addresses them before they escalate. This strategy avoids the costlier repair costs that stem from unaddressed issues and helps the whole hvac system last for decades.

Popular preventive steps include:

  • Scheduling biannual ac maintenance
  • Checking air filters, ducts, and vents
  • Cleaning condenser coils and ensuring proper drainage

Why Preventive Maintenance Trumps Reactive Repairs in HVAC Systems

Preventive hvac maintenance always pays off. By scheduling routine maintenance—such as checking air filters , verifying the operation of the condenser coil , and inspecting the entire hvac unit —you create a system that’s less likely to break down when it’s needed most. When dust, pollen, or debris are removed regularly, your entire system doesn’t have to overwork just to keep your home comfortable. This reduces wear and tear and preserves your investment for the long term .

In contrast, a reactive approach—fixing things only after they break—costs more, creates discomfort, and causes more frequent interruptions. For the best results, schedule biannual checkups and keep a maintenance record. Remember, a maintenance plan is your best insurance policy for beating high repair costs and energy bills.

How HVAC Maintenance Impacts Indoor Air Quality

Good hvac maintenance does more than save energy—it directly improves your indoor air . Systems with clogged air filter s or dirty ducts circulate contaminants, pollen, and dust throughout your home. Over time, this can trigger allergies, asthma attacks, and general discomfort, especially in sensitive individuals. Clean filters and regular cleaning of the evaporator coil and condenser coils reduce the spread of these particles, providing fresher, healthier air for everyone.

According to the EPA and other gov websites, indoor air quality can be several times worse than outdoor air without proper HVAC maintenance. That’s why it’s crucial for homeowners to not just focus on temperature control, but also the cleanliness and purity of the air circulated by their system. For families, this gives greater peace of mind, knowing that every breath is cleaner and safer.

indoor air - happy family enjoying fresh clean air, modern living room, visible HVAC vent

Facilities Management: Integrating HVAC System Maintenance into Your Building Operations

In commercial spaces and multi-unit buildings, integrating hvac system maintenance into overall facilities management is crucial. Proactive protocols not only reduce operational costs but also minimize downtime and keep tenants or employees comfortable. Facilities managers need a consistent, scalable approach to maintenance that aligns with manufacturer recommendations and official guidelines.

Regular monitoring, clear documentation, and scheduled professional inspections should form the backbone of every building’s approach. This ensures all heating, ventilation, and air conditioning systems operate smoothly across seasons and prevents sudden system failures. Consider using digital tools for reminders, and always update maintenance logs for compliance, warranty, and planning purposes.

Building-Wide Preventive Maintenance Protocols for Optimal Efficiency

Preventive strategies in facilities management include creating detailed schedules for inspection, filter changes, coil cleanings, and full system performance reviews. These not only extend the life of the hvac system but also keep energy bills consistent and manageable. Clear protocols help eliminate confusion, ensure accountability, and demonstrate compliance with local regulations or warranty terms.

For large properties, assigning specific responsibilities and recordkeeping within a central system makes reporting and follow-ups simpler. Training staff on the basics of ac and hvac maintenance can reveal small issues before they become costly repairs, ultimately saving time and resources.

Sample Facilities Management Maintenance Schedule
Timeframe Action Responsible Party
Monthly Visual inspection of all units, air filter checks On-site facilities staff
Quarterly Thermostat calibration, ductwork inspection Certified HVAC technician
Biannual Comprehensive ac maintenance, coil cleaning, refrigerant check Licensed professional contractor
Annually Full system performance testing, major repairs/replacements as needed Certified HVAC company
"Regular HVAC maintenance is the heart of successful facilities management."

BEST PRACTICES: HVAC System Maintenance Tips from Industry Experts

Expert advice can take your hvac system maintenance to the next level. Here are some tried-and-true best practices:

  • Monthly system checks and detailed seasonal inspections
  • DIY vs. Professional hvac maintenance: When to call an expert
  • Proactive monitoring of indoor air and system performance

Regular, quick checks can catch minor problems before they balloon into costly repairs. For example, homeowners often replace air filters themselves but should rely on professionals for coil cleaning or refrigerant adjustments. A good rule: if a problem seems complex, beyond a simple swap, or involves electrical components, call a certified technician. Monitoring tools—like smart thermostats and connected sensors—help track energy use and signal when maintenance is due.

hvac maintenance - expert technician team reviewing hvac maintenance checklist in technical workshop

People Also Ask: Answers to Your Top HVAC System Maintenance Questions

What maintenance is required on an HVAC system?

Essential maintenance for an HVAC system includes changing or cleaning air filters , inspecting and cleaning both the evaporator coil and condenser coil , checking the thermostat for accuracy, ensuring proper airflow from vents, and clearing debris from the outdoor unit . Additionally, technicians should check for refrigerant leaks, inspect ductwork for blockages or leaks, and evaluate electrical connections. Routine, seasonal, and annual checkups help identify issues before they become expensive repairs.

What is the $5000 rule for HVAC?

The $5000 rule is a guideline for deciding whether to repair or replace your hvac system . Multiply the age of your system by the estimated repair cost; if the total exceeds $5000, it's typically more cost-effective to upgrade to a new unit. For example, if your HVAC system is 10 years old and the repair cost is $600, 10 x 600 = $6000, so replacement is generally recommended for efficiency and long term savings.

How to properly maintain your HVAC system?

Proper hvac system maintenance starts with changing air filters every 1-3 months, keeping the outdoor unit clear of debris, and scheduling professional inspections at least twice a year. Clean the condenser and evaporator coils annually, and monitor your thermostat regularly. Following a structured maintenance plan reduces energy waste, prevents breakdowns, and ensures optimal comfort.

How often is HVAC maintenance needed?

HVAC systems should receive professional inspections and maintenance at least twice a year—once in the spring before the cooling season and again in the fall before heating starts. Monthly filter checks and seasonal coil cleaning are also recommended, especially in homes with pets or allergies. Regular maintenance—supported by official government and industry standards—keeps your system running reliably year-round.

Frequently Asked Questions on HVAC System Maintenance

  • What are signs my hvac system needs maintenance? Signs include strange noises, reduced airflow, inconsistent temperatures, unusual smells, or rising energy bills. If the system works less efficiently or cycles frequently, maintenance is overdue.
  • How does hvac maintenance help with energy efficiency? Clean coils, filters, and proper airflow reduce the workload on your hvac system , slashing energy bills and optimizing system run times for reliable comfort.
  • Who should perform preventive maintenance tasks? Homeowners can tackle basic steps (filter changes, clearing debris), but certified technicians should handle inspections, deep cleanings, and calibrations as part of comprehensive preventive maintenance .
  • Does warranty require regular hvac or ac maintenance? Most manufacturers require documented, regular maintenance by certified professionals to keep warranties valid. Always check the terms of your system’s warranty and maintain accurate records.

Action Plan: Achieve Optimal HVAC System Performance Through Proactive Maintenance

  • Schedule your routine and seasonal HVAC system maintenance today.
  • Partner with certified professionals for comprehensive ac maintenance.
  • Prioritize preventative maintenance to ensure efficient operation and lasting comfort.

hvac system maintenance planner - seasonal maintenance calendar, digital reminders, work desk background
Take proactive steps now to safeguard your comfort, boost system efficiency, and extend the life of your HVAC system—schedule maintenance today!

Sources

  • Example Site – https://www.energy.gov/energysaver/maintaining-your-air-conditioner
  • Example Site – https://www.epa.gov/indoor-air-quality-iaq
  • Example Site – https://www.ashrae.org/technical-resources/maintenance
  • Example Site – https://www.cdc.gov/nceh/publications/books/housing/cha05.htm

Regular HVAC system maintenance is crucial for ensuring efficiency, longevity, and optimal indoor air quality. For a comprehensive understanding of maintenance tasks, refer to the Complete HVAC Maintenance Checklist , which outlines essential steps such as replacing air filters, cleaning coils, and inspecting ductwork. Additionally, the HVAC Maintenance Tips article offers expert advice on scheduling professional tune-ups and performing regular system checks. By following these guidelines, you can enhance your system’s performance and extend its lifespan.

Plumbing and Heating Services

0 Views

0 Comments

Write A Comment

*
*
Related Posts All Posts
08.15.2025

Radiator Installation: Upgrade Your Comfort Today

Are you wondering how a simple upgrade could completely transform the warmth and energy efficiency of your home? Do you wish you could boost your comfort, save on energy bills, and give your rooms a fresh, inviting atmosphere—all by mastering radiator installation? In this comprehensive guide, you’ll learn exactly how to install a radiator, when you should replace a radiator, and how to make sure your central heating system runs seamlessly. Read on for practical tips, expert-approved steps, and everything you need for a professional-quality result—no matter your experience level. Are You Ready to Transform Your Space with Radiator Installation? Unlock superior comfort and energy efficiency with expert radiator installation. Enhance your home’s heating system with a seamless installation process. Discover actionable tips to ensure your central heating runs optimally. Radiator installation is more than just swapping out an old fixture—it's about maximizing home comfort, boosting energy efficiency , and upgrading your living space. Whether you’re replacing an outdated unit or installing a new radiator to improve your central heating system , the process requires careful planning and the right approach. Many homeowners don’t realize that a professional, precise radiator installation can save on heating costs, create balanced room temperatures, and even enhance property value. Before you dive into the step-by-step process to install a radiator , it’s essential to understand the types of radiators, when replacing a radiator is necessary, and what tools will make the job easier. You’ll also want to familiarize yourself with essential safety measures, choose the best panel radiators for your rooms, and know how to deal with stubborn issues such as trapped air or leaky radiator valves . By following our actionable advice, you can bring professional results to your DIY project or confidently seek expert help for bigger installations. Mastering Radiator Installation: A Comprehensive Step by Step Guide The fundamentals of radiator installation and when to replace a radiator. Key considerations before you install a radiator in your home. Safety measures and professional standards to follow for central heating set-up. Comparison of Radiator Installation Methods Method DIY Difficulty Time Required Recommended For Professional Service Low 2-4 hours Comprehensive swaps DIY Moderate-High 3-6 hours Experienced homeowners “Quality radiator installation not only increases comfort but maximizes system efficiency—saving you money in the long run.” To install a radiator effectively, start by assessing your current heating system and evaluating the type of radiator best suited to your needs. Panel radiators are popular for their efficiency and sleek design, while older homes may require a custom fit for existing pipework. Always consider professional installation for comprehensive overhauls, especially when it comes to integrating with your central heating system or handling gas boiler connections. Laying out your tools and understanding the step-by-step process ensure both safety and quality. To avoid common pitfalls, always turn off and cool your heating system before you replace a radiator, and use PTFE tape on the radiator valve connections for a watertight seal. Safety glasses, gloves, and a tidy, protected workspace help you avoid accidental damage to both your property and the new equipment. By the end of this guide, you’ll have the knowledge to tackle radiator installation with the confidence of a pro. If you're looking for more detailed, locally focused advice on maximizing your radiator's efficiency and ensuring a smooth installation, you might find the Chesterfield radiator installation guide especially helpful. It covers practical tips and troubleshooting steps that complement the process outlined here. Essential Tools and Materials for Radiator Installation Adjustable spanner Pipe cutter Spirit level Radiator brackets and radiator valve PTFE tape Bleed valve tool Wall plugs and screws Bucket and dust sheets Having the right tools and materials on hand is crucial for a safe and effective radiator installation. Key essentials like an adjustable spanner allow you to easily tighten or loosen radiator valves and pipe fittings. A pipe cutter ensures clean cuts if you need to tweak existing pipework, while a spirit level helps achieve that perfectly horizontal finish when you fit panel radiators onto your wall. The use of radiator brackets , wall plugs and screws guarantees that your new unit is securely mounted—reducing the risk of future leaks or misalignment. Don’t forget a bleed valve tool for releasing trapped air after installation, as well as PTFE tape to wrap around screw threads for leak protection. Always have dust sheets and a bucket handy to keep your workspace tidy and capture any residual water. Familiarity with these materials not only simplifies the process but also elevates your results to professional standards. Step by Step Radiator Installation: How to Install a Radiator Correctly Preparing Your Heating System and Workspace Switch off central heating and allow to cool Isolate water supply Lay dust sheets and prepare tools Preparation is vital before you install a radiator . Always start by switching off your central heating system and letting it cool down to prevent burns or water spills from hot water. Locate and close the appropriate isolating valves to stop the water flow to the affected radiator, minimizing the risk of leaks or flooding. Cover the workspace with dust sheets and gather essential tools such as an adjustable spanner , pipe cutter , and all materials. Spend a few minutes familiarizing yourself with the bleed valve tool and PTFE tape before starting. Clean and clear the area—having everything within reach speeds up your project and ensures you won’t be scrambling for tools mid-way through your radiator installation. How to Remove the Radiator Safely Loosen radiator valve Drain the radiator into a bucket Carefully detach from the wall Clean the space and prepare for new radiator When you’re set to remove the radiator , start by loosening the valve outlet with your adjustable spanner . Position a large bucket beneath the radiator valve, and gently open it to release any remaining water; this prevents damage to floors and surrounding surfaces. Once drained, unscrew the radiator brackets and lift the unit away from the wall—take care to support its weight evenly. Give the exposed area a good clean; using wire wool is effective for removing stubborn old sealant or corrosion from pipe ends. This clean base ensures your replacement radiator will sit flush and operate efficiently in its new position. Fitting the Bottom Bracket and Marking Out Panel Radiators Use a spirit level for accurate alignment Drill and secure bottom bracket Attach panel radiators with safety in mind With the old unit removed, it’s time to focus on bottom bracket installation. Mark the new radiator’s position on the wall, making sure to measure the distance between current pipework and bracket slots. Using a spirit level guarantees the brackets will hold your radiator perfectly straight—avoiding uneven mounting that could compromise both function and appearance. Drill and plug the wall, using suitable anchors for your wall type (brick, plaster, etc.), and firmly secure the bottom brackets with screws. Attach your panel radiator , confirming its alignment before tightening all fastenings. Take extra care during this step, as stability here will safeguard against future issues such as leaks or tilts. Visual Step Guide: Radiator Installation Fundamentals Installing the New Radiator and Radiator Valve Fit new radiator valve with PTFE tape Hang new radiator onto brackets Reconnect pipework and ensure tight fittings To install a radiator with complete confidence, wrap PTFE tape around the threads of the new radiator valve —this creates a tight seal to prevent water leaks. Fit the valve to the radiator body first, then position your new radiator onto the previously installed brackets. Once hung, connect the existing pipework to the appropriate inlets, ensuring all connections are snug and leak-free. Use your adjustable spanner to finish tightening the fittings. Double-check that the alignment remains even, especially before fully securing all bolts and screws. If you encounter resistance while fitting valves or pipes, stop and assess; forcing a connection can cause future leaks and compromise your central heating’s efficiency. Bleeding the Radiator and Checking for Leaks Open bleed valve to release air Fill system and check all connections Inspect for leaks and tighten as necessary One of the most crucial steps in radiator installation is using the bleed valve to release any trapped air in your new radiator. Insert the bleed valve tool and open the valve slowly—air will hiss out, followed by a slight trickle of water. This ensures hot water circulates throughout the entire radiator, preventing cold spots and maximizing your heating system’s efficiency . Refill your central heating system and check all valves, joints, and brackets for leaks—pay special attention to any drips or unusual noises. Tighten as needed and have a dry cloth ready for any small spills. Properly bleeding the radiator and confirming all seals are secure guarantees both energy efficiency and lasting home comfort. Testing Your Central Heat and Final Checks Switch on central heating Ensure even heat distribution Make any additional adjustments Once all connections are in place and air has been released, it’s time to turn on your central heating system. Monitor the newly installed radiator as the system heats up. Even warmth across the radiator’s surface confirms a successful radiator installation . If you notice areas that remain cold, double-check that the radiator bleed valve is closed and that no air remains trapped. This is also a good moment to observe for any minor leaks or loose fittings. Address adjustments now, so your system operates at peak performance and you enjoy steady, reliable home comfort. Replace a Radiator: When, Why, and How Identify signs of radiator failure (cold spots, leaks, corrosion) Select appropriate panel radiators for your needs Follow step guide for professional replacement Sometimes, repairs aren’t enough, and you’ll need to replace a radiator entirely. Watch for warning signs like cold spots even after bleeding, persistent leaks, visible rust or corrosion, and very uneven heat. Choosing the right replacement radiator means considering the size of your room, your central heating system specifications, and personal aesthetic preferences—modern panel radiators offer impressive energy efficiency and design flexibility. Follow the step by step guide outlined above, paying extra attention to measurements and sealing connections with PTFE tape . When in doubt or if your heating system is especially complex, consulting a professional can save both time and future repair costs. Correctly replacing a radiator will restore comfort and optimize your entire home’s heat management. Maintaining Peak Performance: Tips After Radiator Installation Regularly check radiator valve and bleed valve Annual checks of central heating system Professional servicing recommendations Keep your investment performing efficiently by checking radiator valves and bleed valves at least twice a year. Schedule an annual inspection of your central heating system —a simple maintenance visit can prevent small issues from turning into big ones. If you notice any changes—such as strange noises, slow heating, or persistent leaks—address them quickly, as they may signal the need to replace a radiator or perform additional system work. Regular maintenance extends the life of your panel radiators and ensures your home remains comfortable and cost-effective year after year. People Also Ask: Radiator Installation Cost, Feasibility, and More How much does it cost to get a radiator installed? The average cost for radiator installation is between $300 and $800, depending on complexity, location, and radiator model. Professional installation often includes system testing and warranty. How much does a radiator install cost? DIY install typically ranges from $150 (for parts) to $300+, while professional services include labor and safety checks, impacting total price. Can I install a radiator myself? It is possible for experienced DIY enthusiasts, but professional radiator installation is recommended to ensure quality, safety, and warranty compliance. Is installing a radiator a big job? Installation can be labor intensive, involving draining, plumbing, and system testing; complexity depends on your current heating system and radiator compatibility. Frequently Asked Questions about Radiator Installation How long does radiator installation take? Professional installation typically takes 2-4 hours, while a thorough DIY job may require three to six hours, depending on your experience and the state of your heating system. What types of panel radiators are best for my heating system? Single-panel radiators are ideal for smaller spaces, while double-panel options deliver higher heat output and are better for larger rooms or properties with older insulation. Do I need to bleed the radiator after installation? Yes, bleeding the radiator is essential to remove trapped air and ensure the system delivers consistent, even heating throughout your home. Can replacing a radiator improve central heating efficiency? Absolutely. Upgrading to modern panel radiators and ensuring proper installation can significantly increase heat output and minimize energy waste. Finalize Your Comfort: Choose Professional Radiator Installation Today Experience seamless warmth and efficient heating performance Expert installation for safety, quality, and peace of mind Contact a trusted provider to schedule your radiator installation and upgrade your living space For maximum efficiency and comfort, schedule your radiator installation with a certified professional and enjoy a warmer, more inviting home today! Now that you’re equipped with the essentials of radiator installation, why not take your home’s comfort and efficiency even further? Explore the central heating maintenance guide to discover proactive strategies for preventing breakdowns and keeping your entire system running smoothly all winter long. By combining expert installation with regular maintenance, you’ll enjoy reliable warmth, lower energy bills, and peace of mind season after season. Take the next step toward a truly optimized home environment—your future self will thank you. Sources Which? – https://www.which.co.uk/reviews/radiators/article/how-to-replace-a-radiator-a5lac9B32WKO Homebuilding – https://www.homebuilding.co.uk/advice/how-to-fit-a-radiator Plumbworld – https://www.plumbworld.co.uk/blog/how-to-remove-and-replace-a-radiator British Gas – https://www.britishgas.co.uk/home-services/help-and-advice/how-to-bleed-a-radiator.html For a comprehensive understanding of radiator installation, consider exploring the following resources: “How To Replace a Radiator” : This guide provides a detailed, step-by-step approach to replacing a radiator, covering essential tools, safety precautions, and common mistakes to avoid. ( autozone.com ) “Preventing Radiator Damage During Installation” : This article highlights common causes of radiator damage during installation and offers practical tips to prevent such issues, ensuring a successful and damage-free installation process. ( northernradiator.com ) If you’re serious about achieving a professional-quality radiator installation, these resources will provide you with the necessary insights and guidance.

08.14.2025

Drain Cleaning Secrets to Prevent Blockages Fast

"Did you know that more than 50% of household plumbing emergencies stem from poor drain cleaning habits?" Unlocking Drain Cleaning: Your First Step to a Clog-Free Home A smooth-running home starts with clean drains—yet, drain cleaning remains one of the most overlooked chores for many homeowners. The importance of keeping your drains in top shape can't be overstated. Not only does effective drain cleaning eliminate the headache of a clogged drain , but it also protects your plumbing system from long-term damage and expensive repairs. Practical, consistent drain maintenance gives you peace of mind while also preserving the value of your home. Consider the routines in your kitchen sink and bathroom: when you notice water draining slowly or detect unpleasant odors, these are clear signals that your pipes need immediate attention. Ignoring these clues can result in a total blockage, water damage, or even costly interventions by a cleaning service. By adopting preventative measures and choosing the right drain cleaner, you’ll enjoy clean drains and uninterrupted plumbing performance. The hidden costs of neglecting drain care add up—think of money spent on emergency drain cleaning services, lost time, and the stress of major repairs. A little proactive effort using both professional products and DIY methods can save you thousands. So, what are the best secrets to keeping your drains free from clogs and your plumbing system in top shape? Let's dive in. Why effective drain cleaning matters: Prevents blockages and protects your home. Common signs of clogged drain issues: Slow draining, gurgling noises, foul odors. The hidden costs of ignoring drain cleaning: Emergency service fees, water damage, major repairs. What You'll Learn From This Guide on Drain Cleaning Top drain cleaners and when to use them Efficient drain cleaning methods that work fast Easy DIY and professional drain cleaning service tips The role of baking soda and vinegar in drain care Cost versus benefit: DIY cleaning vs. hiring cleaning services How to identify and prevent stubborn drain clogs Essential Drain Cleaner Types and How to Choose the Right One Chemical Drain Cleaner vs. Natural Alternatives for Drain Cleaning Selecting the right drain cleaner is crucial when facing a stubborn drain clog. Chemical drain cleaners work quickly and can dissolve organic matter, hair, and grease in just minutes. However, the active chemicals in these products can sometimes cause corrosion in older piping systems or be unsafe for regular use. In contrast, natural alternatives such as baking soda and vinegar are eco-friendly and safe for all types of pipes, though they often take longer to clear severe clogs. The major advantage of chemical drain cleaners is their speed and power—they’re often the first choice for serious, urgent blockages. But repeated use can harm both your plumbing system and the environment, especially if used improperly. Conversely, natural solutions offer a gentler, routine way to maintain clear drains and can be particularly effective against minor or slow-building blockages. Both methods break down organic material, but for tough clogs or tree roots deep in your sewer line, you may need to escalate your strategy. Pros and cons of chemical drain cleaners: Fast action, but may damage old pipes and not eco-friendly. Benefits of using baking soda and other natural cleaners: Safe, sustainable, perfect for maintenance. How drain cleaners work: They break down common drain blockages caused by hair, soap, grease, and other organic matter . When to Call a Drain Cleaning Service for Stubborn Drain Clogs Knowing when to handle a drain issue yourself versus when to call a drain cleaning service is key. If you notice recurring clogs, standing water that won’t drain, or foul odors coming from your pipes, these are signs that DIY solutions aren’t enough. Professional cleaning services use advanced techniques like hydro-jetting or mechanical drain augers to tackle even the most stubborn blockages. They bring experience, specialized equipment, and detailed diagnostics to resolve complex problems affecting your entire sewer and drain system. For more complex plumbing challenges—especially those that impact multiple drains or require urgent attention—exploring the benefits of a dedicated emergency plumber service can be invaluable. These professionals are equipped to respond quickly and efficiently, minimizing disruption and preventing further damage to your home. When you call in a cleaning service, expect a streamlined process: initial inspection, identification of the blockage source, and an effective cleaning plan. Typical costs for professional drain cleaning services range from $100 to $500, depending on severity and accessibility, but investing in a timely cleaning service often prevents much more expensive repairs, like a full sewer line replacement. Signs your clogged drain needs professional attention: Persistent standing water, foul smells, gurgling noises. What to expect from a drain cleaning service: Inspection, thorough cleaning, and expert advice on prevention. Average cost for cleaning service: Most routine drain cleaning services cost $100-$500 depending on severity. Demonstration: Safe Usage and Effectiveness of Chemical Drain Cleaners The Best Drain Cleaning Methods: Fast Solutions for Every Blockage Mechanical Tools: Drain Auger and Their Role in Drain Cleaning When you encounter a persistent drain clog that won’t yield to hot water, vinegar, or commercial cleaners, it’s time to bring out mechanical tools. The drain auger , or plumbing snake, is a tried-and-tested device that physically removes or breaks apart major blockages in your plumbing system. By maneuvering a flexible cable deep into your drain, you can dislodge stubborn materials such as hair, soap scum, and even tree roots infiltrating your sewer line. Other essential mechanical tools used in drain cleaning include plungers and specialized drain snakes. These can quickly clear minor blockages without the need for chemicals. Plumbers rely on robust drain augers as a first-line intervention for kitchen sinks, bathroom drains, and even commercial systems—ensuring clean drains while minimizing the risk of damage to your piping system. Drain auger: A hands-on approach to fast drain cleaning and stubborn drain clogs . Plunger, drain snakes, and more: Key equipment used by every effective drain service. Homemade Solutions – Baking Soda and Vinegar for Drain Cleaning For those preferring gentle, chemical-free options, baking soda and vinegar remain classic choices in the fight against a clogged drain . Start by pouring half a cup of baking soda down the drain, swiftly followed by a cup of white vinegar. The reaction between these two substances foams up, helping to break apart the grime and minor clogs lining your pipes. Cover the drain for about 15–30 minutes to allow the mixture to act on debris, then flush thoroughly with hot water to clear the loosened material. This method is ideal for regular maintenance of kitchen sink and bathroom drains, and it can be repeated weekly to prevent future drain clogs. It’s especially useful for organic buildup like soap residue and food particles, keeping your clean drains in good shape with minimal environmental impact. Step-by-step: Pour baking soda down the drain, add vinegar, cover, then flush with hot water. How long to let it sit: 15 to 30 minutes for maximum effectiveness against organic matter and tough buildup. Comparison of Popular Drain Cleaners Drain Cleaning Method Effectiveness Safety Average Cost Chemical Drain Cleaner High (fast clogs) Use with caution (pipe corrosion risk) $10 - $20 per use Baking Soda & Vinegar Moderate (regular upkeep, light clogs) Very safe, eco-friendly $1 - $2 per use Enzyme-Based Cleaner Good (organic clogs, slow acting) Safe, all pipes $8 - $25 per use Professional Drain Cleaning Service Very high (stubborn, deep clogs) Very safe (expert handled) $100 - $500 per visit Preventing Drain Clogs: Daily Tips to Keep Drains Clean Prevention is the ultimate strategy for maintaining a clog-free home. Begin by adopting daily practices such as disposing food waste and grease in the trash rather than your kitchen sink. Install mesh screens over drains to catch hair and particles, and make it a habit to run hot water down your pipes after heavy use, especially after washing dishes or rinsing oils. Another crucial tip is to avoid flushing items such as coffee grounds, cooking oils, and wet wipes down the drain, as these contribute to stubborn drain blockages and pipe buildup. If you have a garbage disposal, use it judiciously and schedule preventative maintenance with a trusted cleaning service every 6-12 months. Routine practices: Allot time weekly to flush drains with hot water and clean stoppers or screens. Keep out of your pipes: Grease, fibrous vegetables, rice, coffee grounds, paper products, and non-degradable waste. Schedule cleaning services: Preventative drain cleaning services can save money and prevent emergencies. How to Spot Early Signs of a Clogged Drain and Act Fast Spotting drain warning signals early can save you from the hassle of a complete drain blockage. Common symptoms include water that drains slowly, gurgling noises from your pipes, or sudden bad smells coming from the sink or tub. If you observe these, act quickly—try hot water and a plunger before the situation escalates. Conducting simple, routine DIY assessments can be a game-changer. Pour a glass of hot water down the drain, and watch how quickly it disappears. If water lingers or you see bubbles and hear unusual sounds, it’s time to use a drain cleaner or consider calling a cleaning service before a small issue becomes a major headache. Early intervention not only keeps your drains clear but also safeguards your entire plumbing system from extensive and expensive damage. Warning signals: Slow drainage, bubbling, and foul odors from your drains. DIY assessments: Hot water test, frequent cleaning, and basic plunging can prevent emergency service calls. The True Cost of Neglecting Drain Cleaning Delaying routine drain cleaning can be a costly mistake. What begins as a minor blockage may quickly escalate into a full plumbing emergency, leading to pipe replacements or even sewer line repairs. The costs don’t stop at service fees—water damage, mold remediation, and inconvenience all add up. A blocked sewer line can disrupt household routines and potentially affect the health and safety of your family. The longer you wait to address a drain clog , the higher your final bill will be. Regular maintenance with professional cleaning services or safe DIY methods keeps your system running reliably and prevents dramatic, expensive repairs and property damage. From minor drain clogs to major sewer line issues: Early action saves money and stress. How delayed drain cleaning can escalate costs: Repairs, replacement, and restoration fees rise quickly. Average Repair Costs for Plumbing Issues Service Average Cost Drain Cleaning Service $100 – $500 Clogged Drain Repair $150 – $700 Sewer Line Replacement $2,500 – $8,000 Drains, Cleaning Services, and Drain Cleaning Products Reviewed Top-Rated Drain Cleaners and Cleaning Services: Which to Choose for Drain Cleaning With countless drain cleaning products lining store shelves, it can be tough to know which ones actually work. Expert reviews show that while chemical drain cleaners provide rapid relief for tough clogs, many homeowners are shifting toward enzyme-based and eco-friendly solutions for routine drain maintenance. Look for products that clearly list their safe-use instructions and are suitable for your specific plumbing system. When considering cleaning services or cleaning companies, focus on experience, customer reviews, and labor guarantees. Professional cleaning services that offer up-front pricing and same-day service for severe blockages have proven to be most reliable. Practical advice? Always keep a versatile drain cleaner at home for emergencies but rely on trusted professionals for recurring or deep-seated clogs to avoid ongoing headaches. Expert review of top brands: Liquid-Plumr, Drano, Green Gobbler, and enzyme-based cleaners all score highly for specific uses. Best drain cleaning services: Choose drain cleaning companies with proven expertise and positive feedback. Practical advice: Use the right tool and cleaner for each job, and don’t hesitate to call professional cleaning companies if your DIY efforts fall short. Expert Reviews: Testing Top Drain Cleaners on Real Clogged Drains People Also Ask: Common Questions About Drain Cleaning What is the best way to clean your drains? The best way to clean your drains is with regular maintenance using safe, proven products and methods. Combine mechanical tools, such as a plunger or drain snake, with natural or enzyme-based cleaners for ongoing care. Reserve chemical drain cleaners for tough, occasional clogs, and always follow package instructions to ensure both safety and effectiveness. Best practices: Regular cleaning, proper use of cleaners, safe disposal of waste, and timely professional services What is the average cost of drain cleaning? The average cost of drain cleaning depends on the method you choose. DIY options using baking soda and vinegar cost less than $2 per use, while store-bought chemical drain cleaners range from $10 to $20. Hiring a professional cleaning service for stubborn clogs can range from $100 to $500, depending on the extent and severity of the blockage. DIY: $1–$20 depending on materials Professional drain cleaning service: $100–$500 What is the best method of drain cleaning? The best method for drain cleaning varies by situation. For preventative care and mild clogs, natural methods using baking soda and vinegar or enzyme cleaners are ideal. For immediate, serious blockages, chemical drain cleaners or a professional drain cleaning service is recommended. When in doubt, start simple and escalate as needed according to your clog’s severity. Enzyme-based cleaners: Safe, good for maintenance Chemical drain cleaners: Fast, best for tough clogs (use with caution) Professional services: Required for deep, recurring, or severe clogs How long to let vinegar and baking soda sit in the drain? Let the mixture of vinegar and baking soda sit in your drain for at least 15–30 minutes. This gives the chemical reaction time to break up grime and organic matter before you flush the pipes with hot water. For deeper blockages, allow up to an hour for maximum effect. Let sit for 15–30 minutes, then flush with hot water for clean drains. Expert Advice: Drain Cleaning Do’s and Don’ts DO: Use strainers, dispose of grease and food waste properly, and schedule regular drain maintenance. DON’T: Put bones, eggshells, coffee grounds, or non-degradable wipes down the drain. DO: Follow all safety instructions when using chemical drain cleaners —ventilate the area and wear gloves. "Efficient drain cleaning is the cornerstone of a healthy home — don’t wait until it’s too late to act." Frequently Asked Questions About Drain Cleaning How often should you do routine drain cleaning? It’s best to clean your drains every 1–2 weeks for high-use areas, and schedule professional service every 6–12 months depending on your home’s age and usage. Are chemical drain cleaners safe for all pipes? Not always. Some older metal pipes and septic systems can be damaged by harsh chemicals, so check product labeling and consult a professional if unsure. What services do drain cleaning services offer? Professional services include mechanical snaking, hydro-jetting, camera inspections, and sewer line cleaning for stubborn or recurring drain clogs. What is the lifespan of a sewer line with regular cleaning? With regular maintenance and timely cleaning, sewer lines can last 50–100 years, but neglect can significantly shorten that lifespan due to corrosion and blockages. Take Control of Clogged Drains With Effective Drain Cleaning Solutions Choose the right drain cleaner or drain cleaning service today Safeguard your home and budget with proactive drain cleaning Ready for rapid blockages prevention? Take the next step towards cleaner, safer pipes now. Act now—don’t let a clogged drain disrupt your life. Schedule a drain cleaning or pick up a trusted cleaner! If you're looking to expand your knowledge beyond home drain care, consider exploring the broader world of plumbing and heating solutions. Discover how a comprehensive approach to your home's systems can enhance comfort, efficiency, and long-term reliability by visiting our guide on trusted plumbing and heating services . Whether you're interested in preventative maintenance or planning future upgrades, these insights will help you make informed decisions for a worry-free home. Sources Family Handyman – https://www.familyhandyman.com/article/how-to-unclog-any-drain/ This Old House – https://www.thisoldhouse.com/plumbing/21192759/how-to-unclog-a-drain Angi – https://www.angi.com/articles/average-cost-drain-cleaning.htm Home Depot – https://www.homedepot.com/c/ab/drain-cleaner-buying-guide/9ba683603be9fa5395fab9015d9ea6e Bob Vila – https://www.bobvila.com/articles/best-drain-cleaner/ Maintaining clear and functional drains is essential for a healthy home environment. To enhance your understanding and approach to drain maintenance, consider exploring the following resources: “Drain Cleaning without Harsh Chemicals” : This article from Roto-Rooter provides insights into eco-friendly methods for unclogging drains, emphasizing the use of household items like baking soda and vinegar to maintain clear pipes without resorting to harsh chemicals. ( rotorooter.com ) “Drain Cleaning Methods by Pros – General Plumbing Experts” : This resource outlines professional techniques for drain cleaning, including the use of manual drain snakes, motorized drain augers, and hydro jetting, offering a comprehensive understanding of methods employed by experts to tackle stubborn clogs. ( generalplumbing.com ) By delving into these resources, you can gain valuable insights into both DIY and professional strategies for effective drain maintenance, ensuring your plumbing system remains in optimal condition.

08.14.2025

Water Heater Services That Keep You Cozy 24/7

Did you know that nearly 75% of water heater emergencies could have been prevented with regular service? Imagine enjoying your morning shower, warm and relaxing, every single day—without worry that your water heater might leave you in the cold. Professional water heater services are the key to keeping your home comfortable, safe, and stress-free—all year long . In this guide, we’ll uncover why expert water heater repair, installation, and maintenance go beyond convenience—they ensure your constant comfort and peace of mind. Why Reliable Water Heater Services Matter: Surprising Insights You Need to Know When your water heater is running smoothly, comfort and convenience are second nature. But all too often, homeowners don’t realize their system needs attention until a cold surprise interrupts their routine. Reliable water heater services can be the difference between an easy fix and a major headache, protecting your home from unexpected breakdowns, costly water damage, and even safety hazards like gas leaks or faulty pilot lights. According to industry experts, regular water heater service can extend equipment life by years, boost energy efficiency, and prevent mishaps that could ruin your morning. By investing in professional heater installation services or timely heater repairs, you safeguard your family’s comfort and make sure every shower, laundry load, or warm bath goes off without a hitch. Proactive care can even cut your energy costs, since well-maintained gas water heaters , electric water heaters , and modern tankless units waste less and perform better. "Did you know that nearly 75% of water heater emergencies could have been prevented with regular service?" Essential benefits of professional water heater services The full range of water heater repairs and installations available Cost breakdowns and what to expect Who to contact for water heater issues How to choose a trusted water heater service provider Comprehensive Water Heater Services: From Installation to Fast Repairs Complete water heater services cover everything your home could need, from initial heater installation to emergency water heater repair . Expertise matters—whether you have a traditional tank water heater, a modern tankless water heater, or a hybrid heat pump model. Professional service providers help identify the best system for your family, climate, and home design, ensuring you get the highest efficiency and reliability with every install. If something does go wrong, 24/7 heater repairs mean help is never far away. Common issues like water leaks, fluctuating temperatures, or mysterious noises don’t have to wait days for attention. With the right service provider, your hot water is quickly restored—no stressful wait or guesswork. Expert diagnosis can even uncover small problems before they become big emergencies, saving you money and hassle in the long run. Expert Water Heater Installation Services for Your Home Types of water heater installation: traditional, tankless water, and hybrid systems Benefits of professional heater installation Signs it’s time for a new water heater replacement Professional water heater installation is critical for safety and efficiency. Today’s homeowners can choose from traditional tank water heaters , ultra-efficient tankless water heaters , or advanced hybrid systems. Each option has its perks—tanks provide reliable volume, tankless offers endless hot water with lower utility bills, and hybrids excel at using ambient heat for maximum energy savings. But even the best water heaters need expert install to ensure they run right from day one, with venting, plumbing, and electronics all checked and tuned. How do you know it’s time for a water heater replacement ? Common signs include rusty or foul-smelling water, inconsistent temperatures, or age—if your system is over 10 years old, it may be time for an upgrade. The benefits of professional installation include warranty protection, code compliance, and peace of mind knowing every pipe and sensor is up-to-date. Quick Water Heater Repairs and Emergency Service Options Common water heater repair issues: leaks, fluctuating temperatures, unusual noises Fast response heater repairs for 24/7 peace of mind Heater replacement versus repair: When to upgrade Noisy operation, sudden loss of hot water, or a leaking tank often indicate it’s time for water heater repairs . Your local provider’s diagnostic skills can determine if a minor fix—like replacing a faulty thermostat or fixing a pilot light—will do the trick, or whether it’s time for a new installation. Emergency water heater repair services mean you’re never left wondering when help will arrive; expert teams are always ready for rapid response, whatever the issue, and no matter your zip code. Should you repair or replace your system? A trustworthy technician will review heater replacement options only if repair is uneconomical or security is at risk. When tank corrosion, repeated repairs, or major efficiency losses pop up, replacing your water heater might save you hundreds over time—while newer models deliver superior hot water service, reliability, and safety features. Comparison of Water Heater Types and Their Maintenance Needs Water Heater Type Average Lifespan Maintenance Needs Best For Repair/Replacement Frequency Traditional Tank 8-12 years Annual flush, check for leaks, test pressure relief valve Families, high hot water demand Medium Tankless Water Heater 15-20 years Descale unit annually, inspect burner & venting Energy savers, unlimited hot water needs Low Hybrid Heat Pump 13-15 years Check evaporator coil, flush condensate lines Green homes, moderate climates Medium-Low "We know hot water isn’t a luxury—it’s a necessity. That’s why our heater service professionals are always on call." Choosing the Top Service Provider for Water Heater Installation and Repairs What makes a reliable service provider for water heater installation services? How to verify licensing and expertise The value of local professionals and service by zip code Picking the right service provider for water heater installation , repair, or replacement is the key to long-lasting results. Look for companies with transparent pricing, positive local reviews, and proper credentials. The best water heater service providers are licensed, insured, and boast years of experience in heater repairs and installations. Ask about ongoing training, too—advances in energy efficiency, tankless water heater technology, and smart controls are changing the game every year. Working with a local team gives you fast response times and accountability. Many top-rated providers offer service by zip code , so you can feel confident help will arrive quickly no matter where you live. When you’re searching for “water heater install near me,” focus on professionals who stand behind their work, show up on time, and treat your home with respect—from diagnosis to installation service and cleanup. People Also Ask About Water Heater Services How often should a water heater be serviced? Experts recommend servicing your water heater at least once per year. An annual tune-up can include flushing the tank (for traditional models), checking the anode rod, testing the thermostat, and making sure all safety systems work as intended. Regular maintenance helps your system last longer and keeps your hot water safe and reliable every day. Who should I call for my water heater? For most water heater issues, you’ll want to call a licensed water heater service provider or plumber. They have the special tools and experience needed to fix leaks, replace parts, handle gas water heater issues, or install a brand-new heater. Some HVAC professionals also provide service for water heaters, especially for hybrid or heat pump systems. Always choose someone with a proven track record and reviews in your area or zip code. How much does it cost to have someone put in a water heater? The cost to install a water heater depends on several factors, including the type of unit (traditional, tankless, or hybrid), parts needed, and your location. On average, professional installation ranges from $800–$2,500, with tankless water heater installation costing more up front but saving money over time. Remember, prices can be subject to change based on specific requirements and labor rates near your zip code. Get a clear upfront estimate before any work begins. Do you call a plumber or HVAC for a water heater? Both licensed plumbers and HVAC service providers are qualified to handle most water heater repairs and installations. For standard gas or electric water heaters, a plumber is usually your best choice. If you have a hybrid system, integrated home solution, or complicated controls, an HVAC specialist may be better equipped. When in doubt, call a professional service and describe the issue—they’ll guide you to the right technician. The Water Heater Services Process: What to Expect Step-by-step breakdown of water heater repair and installation Safety checks and system testing involved in heater installation services How to prepare your home for a new water heater When you schedule water heater services , the process begins with an in-home evaluation. An experienced technician will inspect your current water heater, discuss your usage needs, and review energy-saving options. Once you agree on a solution, the old unit (if present) is safely disconnected, drained, and removed, before careful heater installation of the new system begins—whether it’s a standard model, tankless water heater, or a hybrid. Skilled professionals handle every detail, from venting and plumbing to precise electronic controls. After installation, thorough safety checks are performed. The technician will test for gas leaks (for gas water heaters), check the pilot light and pressure valves, calibrate the thermostat, and flush the system. For repairs, expect a step-by-step approach that starts with diagnostics and ends with a proven fix—plus guidance on ongoing care. Preparing your home is simple: clear a workspace around the old heater and provide access to gas/water shutoffs if needed. Why Our Water Heater Services Stand Out Proven track record—trusted heater service provider in your zip code Transparent pricing for water heater installations, repairs, and replacements 24/7 availability for heater repairs and emergency water heater service As a locally owned and operated team, we have years of experience providing professional service for water heaters of every type. Our transparent pricing means you’ll always know what to expect—no surprises, just expert water heater installations , fast heater repair , and hassle-free replacements. We are trusted in every zip code we serve for our integrity, quick response, and proven results. Need help after hours? Our emergency water heater service is available 24/7. No more cold showers on winter mornings or stressful delays—just peace of mind delivered by a provider who values your comfort and safety, any time of day. "Your comfort and safety are our priority—rain or shine, day or night." Frequently Asked Questions—Water Heater Services Can I install a water heater myself? While DIY tutorials are tempting, safe and lasting water heater installation requires professional skills—especially for gas or hybrid models. Mistakes can lead to leaks, poor performance, or safety hazards. Always hire a licensed expert for the job. Is tankless water heater installation worth the investment? Yes! Though upfront costs are higher, tankless water heaters use less energy, provide endless hot water, and often qualify for rebates. If your family’s hot water needs are high, the long-term savings make them a smart choice. What are the warning signs I need a water heater replacement? Warning signs include rusty or discolored water, odd smells, persistent leaks, lack of hot water, or a tank older than 10–12 years. These commonly signal the need for water heater replacement —don’t wait for a total breakdown to upgrade. Stay Cozy All Year with Premier Water Heater Services—Schedule Your Appointment Now Don’t wait for a cold shower or an emergency. Contact our expert team for trusted water heater services —from precision installations to fast repairs—right in your zip code. Your comfort, safety, and satisfaction are always our top priority. Schedule your appointment today and enjoy reliable hot water all year long! Sources Energy Saver – https://www.energy.gov/energysaver/water-heating Consumer Reports – https://www.consumerreports.org/home-garden/water-heaters/buying-guide/ Angi – https://www.angi.com/articles/when-replace-water-heater.htm Regular maintenance is crucial for the longevity and efficiency of your water heater. According to the U.S. Department of Energy, annual servicing can prevent sediment buildup, ensuring optimal performance and energy savings. ( pipewrenchplumbing.com ) When considering a new water heater, it’s essential to choose the right type for your needs. Consumer Reports provides a comprehensive guide on different water heater types, including traditional tank models and energy-efficient tankless options, helping you make an informed decision. ( goodtimesrestoration.com ) If you’re serious about maintaining a reliable hot water supply and optimizing energy use, these resources will provide valuable insights and guidance.

Terms of Service

Privacy Policy

Core Modal Title

Sorry, no results found

You Might Find These Articles Interesting

T
Please Check Your Email
We Will Be Following Up Shortly
*
*
*