


Did you know? Installing a DIY electric underfloor heating system can help boost your home’s energy efficiency by up to 25%—making your living space both warmer and more cost-effective from day one.
Dreaming of stepping onto warm, luxurious floors after a long day? With electric underfloor heating, this comfort is within reach for any homeowner. Installing a DIY electric underfloor heating kit not only transforms chilly rooms into inviting spaces but also increases your home’s value and energy efficiency—all without the need for bulky radiators. This comprehensive guide will walk you through every step, from choosing the right materials to ensuring a safe and professional finish, equipping you to enjoy year-round comfort underfoot.
Unveiling the Benefits of Installing a DIY Electric Underfloor Heating System
"Did you know that installing a DIY electric underfloor heating system can improve energy efficiency by up to 25% in modern homes?" – Building Energy Study
Modern homeowners are increasingly choosing underfloor heating to revolutionize their daily comfort and home design. Unlike traditional radiators, electric underfloor heating provides even floor heat throughout every corner of a room, eliminating cold spots and maximizing usable space. The invisible installation enhances the aesthetic of open-plan living areas and bathrooms alike, while also delivering significant reductions in heat loss compared to conventional systems. Property value, energy savings, and the satisfaction of warm feet every morning—these are just the beginning of the benefits when you embark on an underfloor heating installation project. With technology advancing and installation kits becoming more accessible, now is the perfect time to discover why adding this touch of luxury is one of the smartest moves for your next home upgrade.

What You'll Learn About Installing a DIY Electric Underfloor Heating Kit
- Understanding the essential components of an electric underfloor heating system
- Detailed step-by-step installation instructions
- Pro tips for maximising floor heat efficiency
- Practical troubleshooting for common underfloor heating installation issues
- When to call a qualified electrician
- Final checks and system testing
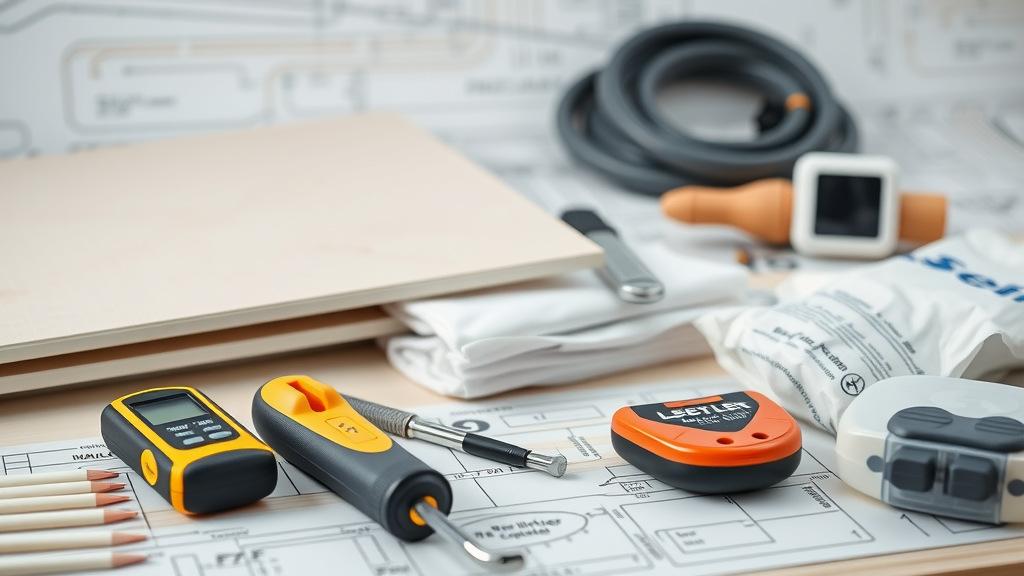
Essential Tools & Materials Needed for Electric Underfloor Heating Installation
- Electric underfloor heating mat/cable
- Insulation boards
- Floor sensor
- Heating cable tester
- Levelling compound
- Thermostat
- Qualified electric tools (multimeter, screwdriver, etc.)
Comparing Floor Heating Systems: Mats, Cables, and Foils
| System Type | Best Use | Installation Difficulty | Cost |
|---|---|---|---|
| Heating Mat | Tile/Stone Floors | Easy | ££ |
| Heating Cable | Irregular Room Shapes | Intermediate | £££ |
| Foil System | Carpet/Laminate | Easy | ££ |
With several floor heating systems to choose from, selecting the right approach for your home is critical. Heating mats offer fast, simple installation and work best for tiled floors or spacious, regular rooms. Heating cables provide flexibility for complex layouts or odd-shaped spaces where mats may not fit. Foil systems are ideal for fitting beneath floating floors like laminate or carpet. Consider your existing floor type, budget, and desired installation difficulty before making a choice. Remember, a well-matched underfloor heating system ensures even floor heat, optimal running costs, and maximum comfort for years to come.
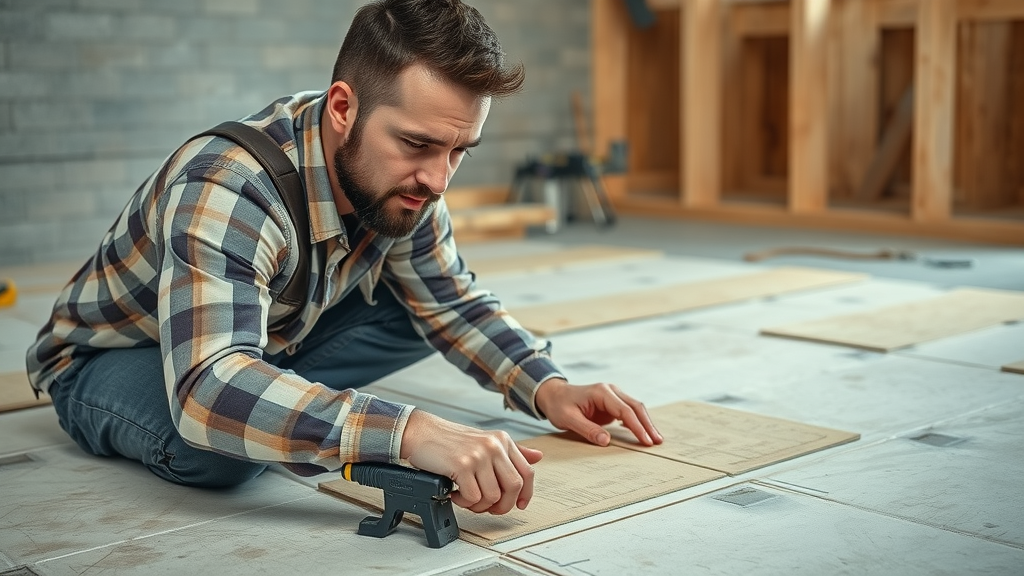
Preparing for Installing Electric Underfloor Heating: Assessing Your Subfloor
The foundation beneath your electric underfloor heating is essential for efficient heat distribution and preventing heat loss. Begin your project by thoroughly assessing your subfloor condition, whether timber floor, concrete, or floorboards. For timber subfloors, inspect for flexibility and secure any loose boards. Concrete requires cleaning and levelling to ensure a flat surface. Insulation boards are paramount, regardless of subfloor type, to direct heat upwards and reduce wasted energy. Proper subfloor preparation not only streamlines installation but also prolongs the life of your underfloor heating system. By laying a solid groundwork, you’ll guarantee a smoother installation and reliable, even warmth through your floors.
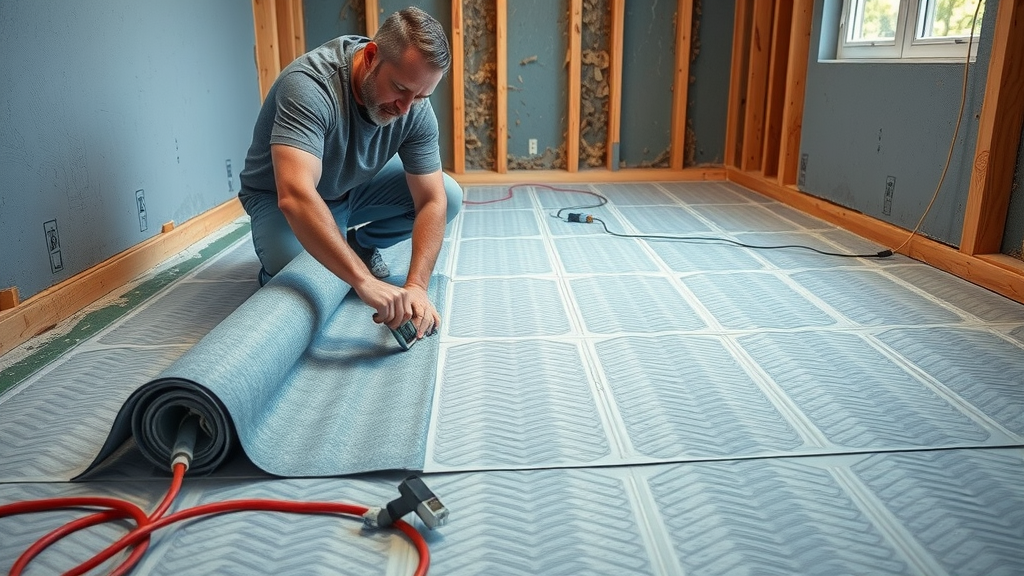
Step 1: Laying Insulation Boards for Enhanced Underfloor Heating Efficiency
- Why use insulation boards?
- Proper fitting techniques
- Addressing uneven floors
Insulation boards are the key to maximizing efficiency in any electric underfloor heating installation. They act as a barrier, reflecting heat upwards where you want it, instead of letting precious warmth disappear into the subfloor. Begin by measuring and dry-laying the boards to ensure tight fits and minimal gaps. When working with an existing floor, make sure to fill any voids or uneven areas with an appropriate filler or levelling compound before fixing the boards in place. Use a sharp blade for cutting and follow the manufacturer’s advice for adhesives or mechanical fixings. For timber floors, stagger the joins to avoid weak points and provide additional support where required. A flat, well-insulated surface not only increases heating speed but also lowers running costs, safeguarding your system’s performance year after year.
Step 2: Placing the Floor Sensor and Planning Electric Underfloor Heating Layout
- Correct position for the floor sensor
- Tips for precise heating mat/cable layout
- Avoiding overlap and cold spots
The floor sensor is the heart of precise temperature control. Always install it between two runs of the heating mat or cable, avoiding direct contact with heating wires and keeping to the centre of your main footfall area. Map out your heating system on the subfloor before fixing anything in place; this prevents last-minute problems or inefficient coverage. Keep a 50–100mm gap from walls and permanent fixtures to avoid wasted heat and overheating. Mats can be trimmed (never the cable!) and rerouted to fit awkward spaces. For timber floors or floorboards, ensure the sensor is protected in conduit, enabling easy replacement if needed. Planning with care now avoids cold spots and helps deliver that luxurious, even floor heat you crave.
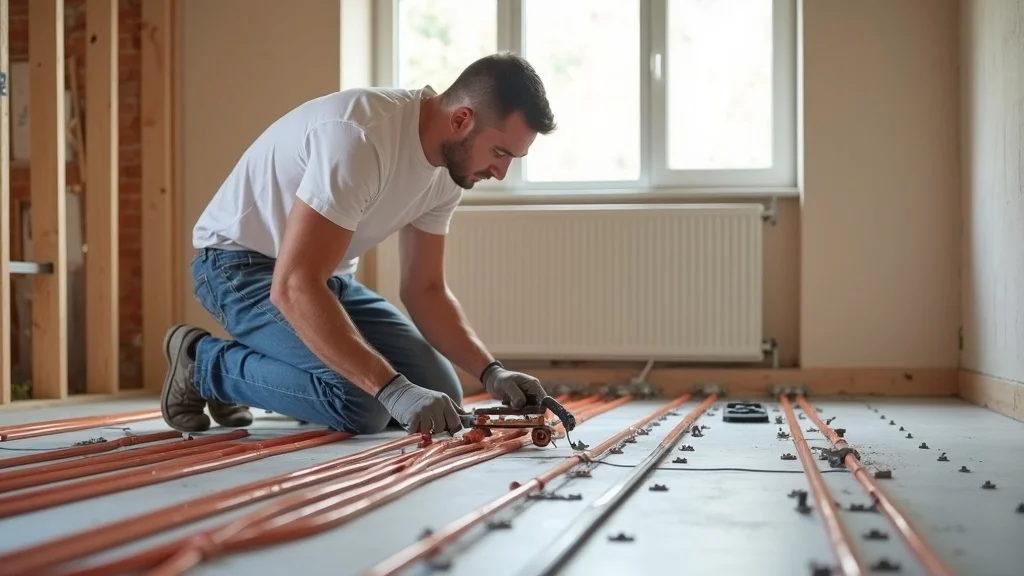
Step 3: Installing Electric Underfloor Heating Mats or Cables
- Fixing heating mat or cable securely (adhesives, tape, or clips)
- Cutting mats to fit room without damaging the heating cable
- Specific considerations for underfloor heating systems on timber floors and floorboards
Secure your heating mat or cable using the recommended fixing method such as double-sided tape, glue, or specialised clips. Only cut the mesh mat, never the heating cable itself. For L-shaped or irregular rooms, arrange loose cables in a serpentine layout, maintaining even spacing for optimal floor heating performance. On timber floors and floorboards, add extra cushioning via insulation and verify all fastenings avoid nails or screws that might puncture cables. Proceed carefully, checking every connection and making sure there are no sharp bends that could weaken the cable’s integrity. An even and secure installation at this stage means reliable warmth and minimal maintenance in future.
For those who prefer to learn visually, this real-world video walkthrough will guide you through laying insulation boards, unrolling the electric underfloor heating mat, and ensuring a professional finish every time. Don’t miss essential handling tips and best practices for perfect floor heat.
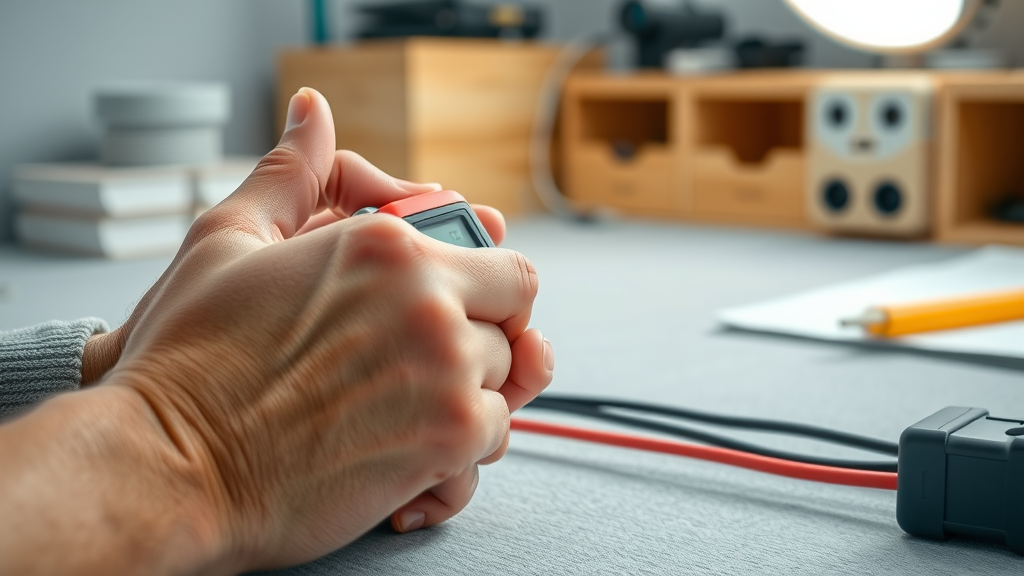
Step 4: Testing the Heating Cable – Ensuring Reliability Before Covering
- How to use a heating cable tester
- Why continual testing during the underfloor heating installation process prevents costly errors
Never skip the critical step of testing your heating cable before, during, and after installation. Use a reliable heating cable tester (multimeter) to conduct a resistance test, comparing your meter readings to the manufacturer’s specification found in your kit instructions. Continual checks allow you to catch issues early—such as cable breaks or shorts—before your system is covered with heavy levelling compound or tile adhesive. Should you spot any faults, address them immediately to avoid rework or costly damage. Remember, documentation of these results is often required if you ever need to claim your product warranty. Consistent vigilance at this stage protects your investment and ensures long-lasting floor heat.
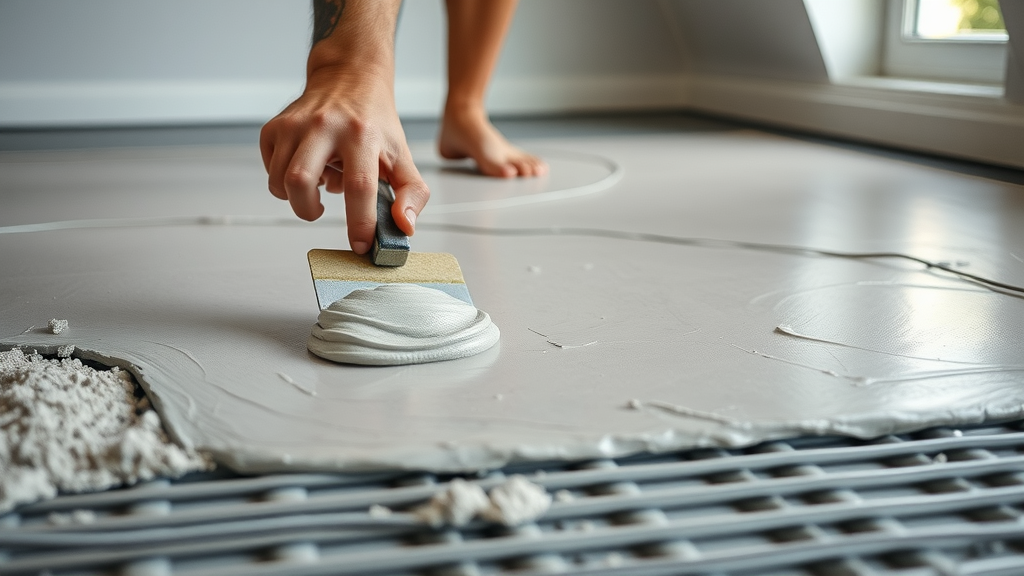
Step 5: Applying Levelling Compound over Electric Underfloor Heating
- Choosing the right levelling compound for your heating system
- Proper application for smooth floor finish
- Curing times and safe walk-over details
A smooth finish is essential for both protecting your cables and preparing your floor for final coverings. Select a levelling compound compatible with electric underfloor heating systems—these are designed for thermal conductivity and will prevent heat build-up. Mix according to the packet, and pour steadily, using a trowel to distribute the compound evenly across the mats or cables. Ensure no air pockets or voids remain, and spread to a depth advised by your kit. Allow for full curing—typically 24–48 hours—before walking on or proceeding to final floor coverings. This extra step provides an additional layer of assurance that your heating system remains well-protected and is positioned perfectly for delivering consistent, efficient floor heat.
Step 6: Connecting to Power Supply – The Role of a Qualified Electrician
- Understanding your home’s power supply requirements
- Legal and safety reasons to consult a qualified electrician during electric underfloor heating installation
- Certification and Part P compliance
While much of the electric underfloor heating installation process is suitable for competent DIYers, connecting your system to the home’s power supply is strictly the domain of a qualified electrician. UK building regulations (including Part P) require all final electrical work to be undertaken and certified by a professional for safety, insurance, and resale reasons. Always make sure your chosen electrician is capable of issuing the necessary certificates—this safeguards both your property and your investment. Collaborating with a registered pro ensures your entire heating system meets compliance, is tested for safety, and operates efficiently from the very first use.
Step 7: Installing the Thermostat and Programming Your Underfloor Heating System
- Selecting a compatible thermostat for your electric underfloor heating system
- Installing and testing to ensure responsive temperature control
- Optimal thermostat settings for energy efficiency
The right thermostat brings your new underfloor heating system to life, granting you ultimate control and convenience. Choose a model designed for use with electric underfloor heating, favoring programmable or smart thermostats for the best efficiency and savings. Installation involves wiring the device (typically done by your qualified electrician), connecting it to the floor sensor, and ensuring all settings respond swiftly. Modern thermostats let you program heating schedules around your lifestyle, maximizing comfort and minimizing running costs. Careful calibration is key; set your target temperature for when you’re home and allow the system to pause when no one is around. This step guarantees you enjoy both luxury and low energy bills for years ahead.

Step 8: Final Checks, Safety, and Commissioning Your Floor Heating System
- Performing a systemwide test
- Reviewing safety measures after installation
- Registering your warranty
With installation complete and the system connected, it’s time for final safety checks. Perform a comprehensive test, cycling through temperature settings and checking for any signs of malfunction. Review all wiring, sensor placement, and thermostat operation, making sure you adhere to the manufacturer's checklist. Register your product warranty online to secure future support or claims. Responsible commissioning ensures lasting safety, maximum satisfaction, and full regulatory compliance for your new electric underfloor heating investment.
Expert insight is invaluable when things don’t go to plan. This troubleshooting video addresses typical floor sensor positioning errors, issues with heating cable integrity, and thermostat settings failures. Learn to identify and resolve these problems quickly, so your system delivers perfect floor heat—every day.
Pro Tips for Maintaining Your Electric Underfloor Heating for Lasting Performance
- Regular checks for heating system efficiency
- Recommended cleaning and maintenance
- When to consult a qualified electric professional
To maximize the lifespan and effectiveness of your electric underfloor heating system, adopt a simple maintenance routine. Inspect your thermostat periodically to ensure it responds to temperature changes and maintains set schedules. Clean the floor with suitable products, avoiding corrosive or moisture-rich cleaners that can seep under poorly sealed coverings. Monitor for unusual cold spots, which can signal sensor issues or cable faults. If you notice persistent problems or suspect damage, always seek the guidance of a qualified electrician—prompt intervention prevents small faults from becoming bigger, costlier fixes. With just a little regular attention, your floor heating will provide reliable, energy-efficient comfort for decades.

People Also Ask About Installing a DIY Electric Underfloor Heating
Can I install electric underfloor heating myself?
Yes, with careful planning and adherence to manufacturer guidelines, many homeowners can install a DIY electric underfloor heating kit. However, all electrical connections should be handled by a qualified electrician for safety and regulatory compliance.
Do I need an electrician to install underfloor heating?
For laying heating mats or cables, you may proceed as a competent DIYer; but connecting to the mains power supply must be carried out by a qualified electrician to ensure safe and legal installation.
What to put under electric underfloor heating?
Always use insulation boards under electric underfloor heating to boost efficiency, reduce heat loss, and protect the heating cable or mat as advised in all leading underfloor heating installation guides.
Can electric underfloor heating be laid on floorboards?
Yes, electric underfloor heating can be installed on floorboards, but a layer of insulation board is essential, and additional levelling compound may be required to protect the heating system and maintain an even surface.
Underfloor Heating Installation FAQs
- How much does installing a DIY electric underfloor heating kit cost?
- How long does an underfloor heating installation take?
- What kind of flooring is compatible with electric underfloor heating?
- Is maintenance required and how often?
- What are common mistakes to avoid in heating installation?
Key Takeaways: Why Installing a DIY Electric Underfloor Heating System is a Smart Investment
- Electric underfloor heating delivers even, comfortable floor heat
- DIY systems can be installed efficiently with step-by-step care
- Using a qualified electrician for final connections keeps your installation legal and safe
- Insulation boards and levelling compound are crucial for system longevity

Ready to Upgrade Your Home Comfort? Choose Peak Underfloor Heating Ltd for Your Electric Underfloor Heating Project
Take the first step toward efficient, luxurious comfort underfoot—contact Peak Underfloor Heating Ltd for expert guidance, quality kits, and professional underfloor heating installations tailored to your retrofit project.
Conclusion: Transform Your Living Space with DIY Electric Underfloor Heating
Embrace the warmth and efficiency of floor heating. Whether retrofitting or building new, installing a DIY electric underfloor heating system adds comfort and value to your property—and with Peak Underfloor Heating Ltd, you’re guaranteed quality and peace of mind.
Sources
- Example Site – https://www.energy.gov.uk/publications/building-regulations-part-p-electrical-safety-dwellings-guidance-notes
- Example Site – https://www.underfloorheatingtradesupplies.co.uk/installation/
- Example Site – https://www.energysavingtrust.org.uk/advice/underfloor-heating/
- Example Site – https://www.peakunderfloorheating.co.uk/
Installing a DIY electric underfloor heating system can significantly enhance your home’s comfort and energy efficiency. To ensure a successful installation, it’s crucial to follow a comprehensive guide that covers all necessary steps and considerations.
For a detailed walkthrough, consider the article “Choosing and Installing Radiant Floor Heating Systems.” This resource provides insights into the tools and materials required, as well as a step-by-step installation process, making it an invaluable companion for your project.
Additionally, the guide “Installing underfloor heating - Step-by-step guide and video” offers practical advice and a visual demonstration to assist you through each phase of the installation. This combination of written instructions and video content can help clarify complex steps and ensure a smooth installation process.
By consulting these resources, you’ll be well-equipped to install your electric underfloor heating system efficiently and effectively.


Write A Comment